
Introduction
Installing a dryer vent is a very easy task, and you don’t need to call a professional for it. In other places and for other appliances, the vent setup can be a bit tricky, but not for dryers.
For instance, some days ago, I had to call in my HVAC guy to fit a vent on my stove hood because I couldn’t figure out how the cabinet panels in front of it had been fitted. I couldn’t get behind the thing. The task itself was simple.
However, with a dryer vent, there is usually nothing of the sort to worry about. It’s a straightforward process, and we’re going to guide you on how to do it. It’s a straightforward process, and many people have to do it as a solution for an overheating dryer. We’re going to guide you on how to do it.
Materials Required for Dryer Vent Installation
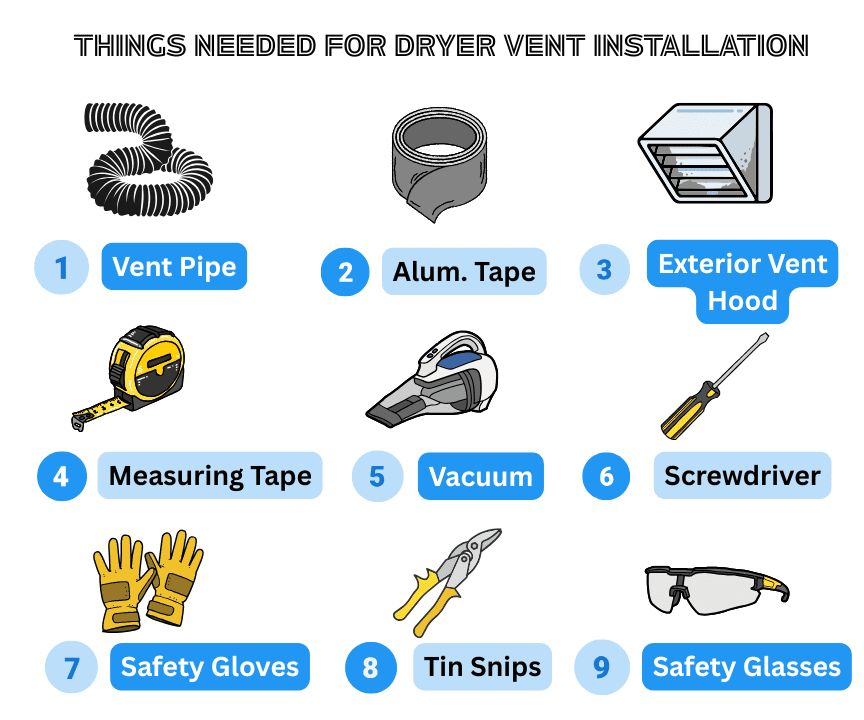
| Materials | Tools |
| Duct pipe (length and width as per your dryer) | Measuring Tape |
| Screwdriver | |
| Aluminum tape or band clamps | Handheld vacuum |
| Safety gloves | |
| Exterior wall vent hood | Tin snips |
| Safety glasses for eye protection |
Steps to Follow
Now, let’s talk about the steps.
1. Gather Your Tools and Put on Your Safety Equipment
Get everything that we’ve mentioned above in the list and put on your gloves and glasses. Keep all of the items close by so that you don’t have to pause the process and go looking every now and then.
2. Bring the Dryer Forward so that You Can Access the Back
Once you are all set, you need to access the back of the dryer so that you can clean the area and install the new pipe. Depending on your setup, you might have to bring the dryer forward.
Of course, if the dryer is new, then you can simply bring it near the area where you want to permanently keep it and start from there.
3. Clean the Dryer by Eliminating Lint
If your dryer is new, you can ignore this step.
If the dryer is not new and you’re replacing the vent pipe, you have to clean the venting system so that there is no debris or lint trapped in the outlets.
Here is what you need to do:
- Remove the existing vent pipe
- Remove any lint that you see using your hands
- For the finer bits and stuck pieces, use the vacuum
4. Clean the area Outside Your Home Where the Exterior Duct is Located
Then, head outside where the exterior duct is located and clean that area too. Just remove big pieces of debris and leaves, etc., that can obstruct the airflow.
Then head back inside. It’s probably cold out there.
5. Measure the Size of the Vent Pipe Required
After all these steps, we’re done with the preparations, and we can get started with the actual installation.
Measure how long the vent pipe needs to be. Normally, you’ll need 4 to 6 feet of piping, depending on how far from the wall the dryer is placed. In many homes, the dryer is put flush against the wall, and the length of the pipe simply ensures that you have room to pull the dryer out and move it around if needed.
Check your exact placement and confirm the length that you need for the pipe.
6. Cut the Vent Pipe to the Required Size
Use the tin snips to cut the vent pipe to the required size. Remember, even if you know the exact size you need, it’s still a good idea to buy it a bit longer from the store so that you have room to adjust.
If you’ve done that, this is the step where you go snippy-snippy. (Make sure you’re wearing your safety glasses.)
7. Connect the Vent Pipe to Both Ends and Secure with Tape
With the appropriately sized pipe in your hands, connect one end to the dryer and the other end to the hole that leads to the outside.
Try a dry fit so that you know it’s snug. The standard diameter for the vent duct is 4 inches, and you shouldn’t have a problem…usually.
Tip: If the wall collar is a bit smaller than the pipe, roll your aluminium tape a few times around the former. This will add a bit of thickness, and the pipe will be able to fit.
(You can also use pipe clamps for this purpose.)
8. Add the Exterior vent Cap to the Outdoor Area where the Pipe Blows Out
This step applies if this is a first-time installation.
You have to add an exterior vent cap to the opening on the outside. This prevents “stuff” from coming up the wrong way and causing trouble in your dryer.
If you are replacing the vent pipe, you can simply clean and check the exterior vent cap before heading back inside.
9. Put the Dryer Back
Yet the dryer is back into place.
10. Test the Airflow
Turn the dryer on at a minimal setting to check the airflow. Go outside and hold your hand near the exterior vent opening. You should feel a strong, steady stream of warm air pushing out. If the airflow is weak, uneven, or you feel almost nothing, there is probably a blockage or a kink somewhere in the duct that needs another look.
11. Take off your safety Equipment and voila!
Take off your safety glasses and your gloves, and that’s it.
Is It Worth Changing The Vent Pipe, Or Should I Just Get a New Dryer?
You should almost always change the vent pipe, as it is very affordable. The only situation where you should get a new dryer instead is if it is very old and multiple components are falling apart at the same time.
The same goes for the heating element, now that we mention it. We actually wrote a dedicated post for it, so check that out while you’re here.
In Conclusion
And there we have it. Anyone can install a dryer vent. It’s not very difficult.
However, remember at all times that you’re dealing with an electrical appliance; one that uses heat and shoots out hot air. Be cautious and careful when doing anything during the process.